13-night Auckland & Rotorua & Wellington & Christchurch
Auckland’s central afternoon pairs skyline drama with the city’s working harbor in a way that feels distinctly urban and seaside at once.

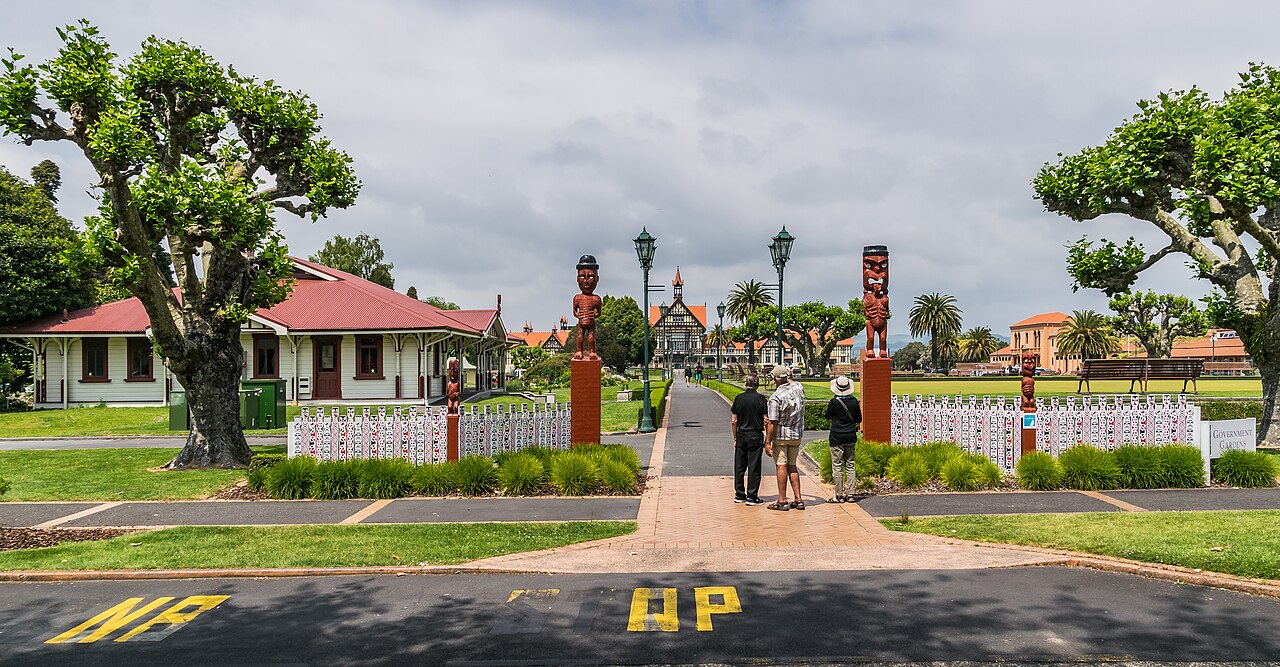


Auckland → Rotorua → Wellington → Christchurch
The trip moves from Auckland through Rotorua and Wellington and Christchurch, while keeping each day centered on its assigned city and preserving practical arrival, transfer and departure time.
Where to stay
These are recommended base areas, not individual hotel endorsements. Compare current location, room layout, reviews, price and availability before booking.
A practical base for the selected plans in Auckland.
A practical base for the selected plans in Rotorua.
A practical base for the selected plans in Wellington.
A practical base for the selected plans in Christchurch.
The complete itinerary
Stay downtown and move mostly on foot, with buses or short ride-hails only when you want to bridge a few wider gaps between the waterfront, inner-city sights, and the zoo area. The ferry day to Waiheke is the main out-of-city movement, so a car is unnecessary for the whole Auckland stay.
Auckland
Keep the arrival portion flexible, settle in and use the selected plan as the day’s main anchor when timing and energy allow.
Use this time for arrival, luggage and hotel check-in when available, then keep the pace light before the next plan.

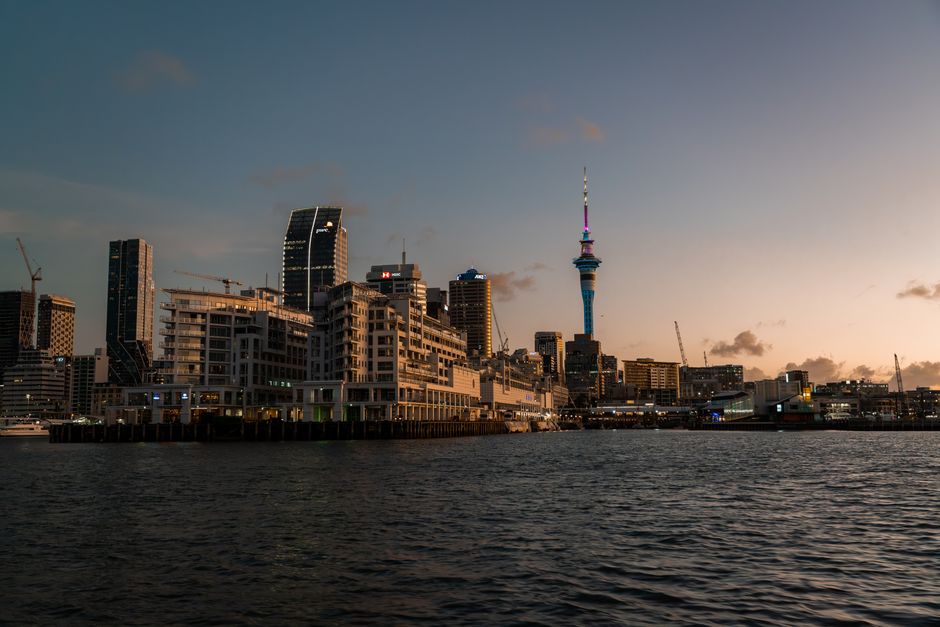

Auckland’s central afternoon pairs skyline drama with the city’s working harbor in a way that feels distinctly urban and seaside at once. Glass towers, waterfront promenades, and view-heavy streets give this part of town a polished but relaxed feel, especially when the light softens later in the day.
Central city on foot: Stay based in Auckland Central and explore the Sky Tower, galleries, and Viaduct Harbour mostly on foot. Short bus or taxi hops are only useful if you want to save energy between the waterfront and inland sights.
Auckland
Use the selected plan as the day’s main anchor and keep the remaining time flexible for rest, meals or a nearby activity.
This morning shifts Auckland from downtown energy to a greener, animal-focused part of the city where wildlife and open parkland sit side by side. Western Springs adds broad lawns and lake views, and the low-rise setting feels calmer than the central core while still staying close to the city.
Use the open time for rest, a leisurely meal or a short nearby activity only when weather and energy support it.
Zoo area access: Use a bus or ride-hail from Auckland Central to reach Auckland Zoo and Western Springs, then continue on foot around the park areas. This is an easy no-car day, with the return trip simplest by the same mode you used out.
Auckland
Use the morning and afternoon plans as the day’s two anchors, with time between them for transportation, meals and breaks.
Parnell and Auckland Domain give the city a more graceful, heritage-minded side, where gardens, museum displays, and older streets feel set apart from the downtown bustle. The Domain’s open lawns and tree cover make a pleasant transition into the day, while Parnell Road brings villa-lined streets, galleries, and cafés that reflect one of Auckland’s oldest neighborhoods.
Wynyard Quarter and Silo Park show Auckland’s waterfront renewal at its most polished, with industrial edges softened by public art, wide promenades, and marina views. The area feels especially alive in the afternoon and evening, when the harbor light picks up the cranes, silos, and city skyline.
Harbour and Parnell: Mix walking with a short bus, tram-like shuttle, or ride-hail between the Domain, Parnell, and Wynyard Quarter if you want to save time. The core of the day is still very city-friendly, so a car is not worth the parking hassle.
Auckland
Use the selected plan as the day’s main anchor and keep the remaining time flexible for rest, meals or a nearby activity.
Waiheke Island feels like Auckland’s most complete escape: beaches, vineyard hills, and small-town village life all sit within one day. The island’s mix of coves, scenic roads, and tasting rooms gives it a slower rhythm than the mainland, with views changing quickly as you move between bays and ridgelines.
Use the open time for rest, a leisurely meal or a short nearby activity only when weather and energy support it.
Waiheke day trip: Take the ferry from downtown Auckland to Waiheke and use local buses, taxis, or a tour shuttle once on the island. Keep your return flexible so you are not rushing the ferry back after vineyard or beach time.
Auckland → Rotorua
Driving is the most practical overall choice here if you want flexibility and easy access to Rotorua after arrival. It also gives you the simplest setup for getting around the area once you are settled in Fenton Park.
A car is useful for the Rotorua transfer and gives you the most flexible setup for getting around the wider area, especially if you want easy movement after settling in. That said, the planned city days themselves stay fairly local, with walks, short rides, and some biking handling most sightseeing comfortably.
Rotorua
Travel from Auckland to Rotorua, check in and preserve a comfortable buffer around the selected plan.
Use this time for the move to Rotorua, luggage and hotel check-in, leaving a comfortable buffer before the next plan.
Arriving in Rotorua: After arrival, keep movement local and simple around Fenton Park and nearby dining or geothermal areas. A short walk, local bus, or ride-hail is usually enough to settle in and start the day comfortably.
Rotorua
Use the selected plan as the day’s main anchor and keep the remaining time flexible for rest, meals or a nearby activity.
Te Puia and Whakarewarewa give Rotorua its clearest blend of living Māori culture and active geothermal landscape. Steam vents, carved meeting spaces, and working craft traditions make the area feel present-tense rather than museum-like, with the earth itself shaping the experience.
Use the open time for rest, a leisurely meal or a short nearby activity only when weather and energy support it.
Geothermal close-by: Te Puia and Whakarewarewa are close enough to reach with a short ride or a moderate walk from Fenton Park. Keep the day car-light and use the same simple return method after sightseeing.
Rotorua
Use the morning and afternoon plans as the day’s two anchors, with time between them for transportation, meals and breaks.
The Redwoods and Whakarewarewa Forest give Rotorua its best outdoor contrast: tall exotics, soft forest light, and a network of tracks that feel adventurous without being remote. The scale of the trees and the cool shade make the forest especially appealing after busier cultural stops, and the area has a distinct mountain-biking and walking culture.
Polynesian Spa and Kuirau show Rotorua’s geothermal side in a calmer, restorative way, with hot water, mineral scents, and parkland close to the city center. The area feels less like a major attraction strip and more like a place to slow down, soak, and watch steam drift over the landscape.
Forest and spa hops: Use short rides, cycling, or walking to combine the Redwoods area with the city-center spa and park precincts. The day works best as a set of nearby stops rather than a driving-heavy loop.
Rotorua → Wellington
Flying is the best balance of time and practicality for this longer cross-country move. Once you factor in airport access and transfer time at both ends, it still beats the long ground alternatives by a wide margin.
Keep Wellington car-free and rely on walking, short bus links, and the cable car for the compact central, waterfront, and hilltop sights. The city is easy to cover without driving, and parking is more trouble than it is worth for this stay.
Wellington
Travel from Rotorua to Wellington, check in and preserve a comfortable buffer around the selected plan.
Use this time for the move to Wellington, luggage and hotel check-in, leaving a comfortable buffer before the next plan.
Arriving in Wellington: Once you’re in Wellington Central, stay on foot for the waterfront, civic core, and nearby museum area. The compact center makes it easy to settle in without needing a car on arrival day.
Wellington
Use the selected plan as the day’s main anchor and keep the remaining time flexible for rest, meals or a nearby activity.
Te Papa and the Civic Waterfront put Wellington’s civic heart on display, mixing major museum collections with an open harbor edge. The waterfront feels close to the city’s working and cultural life at once, and the promenade gives easy views over the harbor while staying near cafés and public spaces.
Use the open time for rest, a leisurely meal or a short nearby activity only when weather and energy support it.
Waterfront walking: Walk between Te Papa, the waterfront, and the civic center; all are close enough for a relaxed urban day. If you want to conserve energy, a short bus ride can replace one of the links, but it is not essential.
Wellington
Use the selected plan as the day’s main anchor and keep the remaining time flexible for rest, meals or a nearby activity.
Kelburn and Zealandia bring together Wellington’s steep hills, botanic greenery, and native-wildlife focus in one compact day. The city feels especially scenic here, with cable-car views, hillside paths, and a cooler, more sheltered atmosphere than the waterfront below.
Use the open time for rest, a leisurely meal or a short nearby activity only when weather and energy support it.
Kelburn links: Use the cable car or a short bus/taxi hop to connect Kelburn, the botanic area, and Zealandia. The route is straightforward and compact, so a car adds more hassle than value.
Wellington → Christchurch
Flying is the clearest choice for this inter-island leg because it saves the most time and avoids a very long road-and-ferry journey. It fits well with a Christchurch stay that does not require a car in the center.
Use walking as your default in central Christchurch, with the tram and short local bus links as convenient add-ons for a few nearby areas. The itinerary stays centered on the core, gardens, and easy city sights, so you can finish the stay without a car.
Christchurch
Travel from Wellington to Christchurch, check in and preserve a comfortable buffer around the selected plan.
Use this time for the move to Christchurch, luggage and hotel check-in, leaving a comfortable buffer before the next plan.
Arriving in Christchurch: After arrival, keep to the central city and nearby riverside or retail streets on foot. Short local rides are only worth it if you want to save time getting settled in the compact center.
Christchurch
Use the selected plan as the day’s main anchor and keep the remaining time flexible for rest, meals or a nearby activity.
Christchurch Botanic Gardens and Hagley Park show the city at its calmest, with wide lawns, planted collections, and slow-moving paths that suit a relaxed morning. The landscape feels open and restorative, shaped by water, trees, and the lingering elegance of a city rebuilt around green space.
Use the open time for rest, a leisurely meal or a short nearby activity only when weather and energy support it.
Gardens and Hagley: Walk between the Botanic Gardens, Hagley Park, and nearby memorial and heritage stops from the central city base. If you want a break from walking, a very short bus or taxi ride is the only practical extra help you need.
Christchurch
Use the morning and afternoon plans as the day’s two anchors, with time between them for transportation, meals and breaks.
Cathedral Square and the Central City capture Christchurch’s rebuild story, where heritage facades, modern civic spaces, and compact streets sit side by side. The area is shaped by resilience as much as architecture, and the contrast between older landmarks and newer development gives the walk real context.
New Regent Street and the Tram Loop give Christchurch its most charming heritage-and-dining hour, with pastel facades, short blocks, and an easy rhythm that invites lingering. The street feels intimate rather than grand, and the tram brings a classic sightseeing layer that ties the central city together.
Central tram stroll: Explore Cathedral Square, New Regent Street, and the Arts Centre on foot, then use the tram as a simple local add-on rather than a full transport requirement. This is the most walkable day of the trip, with easy returns to your accommodation.
Christchurch
Keep the day flexible for breakfast, checkout, luggage and onward travel. Add only a short nearby meal or walk if your departure timing leaves a comfortable buffer.
Departure day: Keep the final movements simple and direct from Central City to your departure point. A short taxi or ride-hail is the easiest backup if you are carrying luggage or want a stress-free finish.
Personalize this itinerary for you
Preload the cities, nights, pace, trip rhythm and major trip goals, then add your own dates, travelers, budget and preferences.
Customize this trip